VPN is a service that allows a remote user to create a secure tunnel into the ICTS network over a non-ICTS Internet service provider. Once authenticated the user is then able to gain access to ICTS-restricted resources.
For remote access to internal services hosted at the ICTS, we utilize the OpenVPN software. This software allows authenticated users to create an encrypted tunnel or Virtual Private Network (VPN) between their remote device and our campus. This has a dual purpose of protecting your traffic from malicious networks and gaining you secure access to campus resources. This access includes services like clusters, workstations, and access to journals.
This page links to installation guides for various devices and operating systems.
How to setup VPN
For Ubuntu 24.04
- Open Settings on Ubuntu.
- In the left sidebar, click Network.
- Under the VPN section, click the + (Add) button.
- Select Import from File....
- Browse to and select the
.ovpnfile provided by the Center, then click Open. - Enter the VPN credentials shared by center
- Note: Some versions of Network Manager may prompt for a Private Key Password / Use key Password. If prompted, enter the same password as your VPN account password.
- Click Save to save the VPN configuration.
- Click the Network icon in the system tray, navigate to VPN, and select the configured VPN connection to connect.
For Older Ubuntu Versions
1. Install Required Packages
Open a terminal and run:
sudo apt-get install openvpn network-manager-openvpn network-manager-openvpn-gnome2. Restart Network Services
After installation, restart the networking service:
sudo systemctl restart networkingAlternatively:
sudo /etc/init.d/networking restart3.VPN Configuration
- Click the Network icon and select Edit Connections (or Network Settings, depending on your Ubuntu version). Click Add

- From the connection type drop-down list, select Import a Saved VPN Configuration.
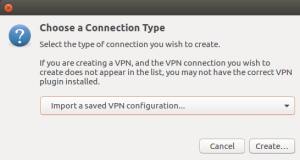 Import the
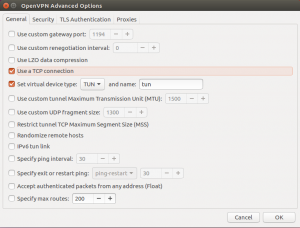
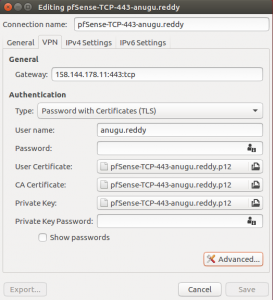
 pfSense-TCP****.ovpnprofile provided by the Center and it should automatically import some things into the next screen.- Click Advanced... and ensure that Use a TCP Connection is enabled (Protocol: TCP).
- Provide the username and password for VPN (User ID: ****** and password ******)
Provide Private Key Password ( Repeat your VPN Password ******* ) .Save
- Click the Network icon in the system tray, navigate to VPN, and select the configured VPN connection to connect.
For MAC
- Download OpenVPN Connect stable version for Mac from the official website (https://openvpn.net/client/)
- Install OpenVPN Connect Application
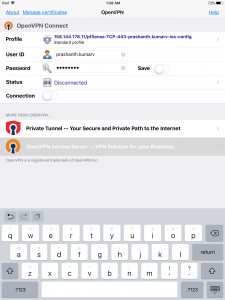
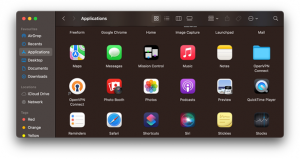
- Open OpenVPN from Applications.
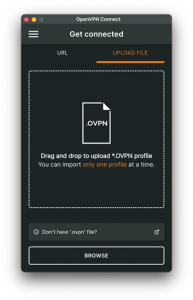
- Add the your ****.ovpn profile shared by the center.
-
Enter the username and password of the VPN and click connect.
-
Use the toggle button to switch on or off the VPN.
For Windows
-
-
- Download OpenVPN Connect stable version for Windows from the official website (https://openvpn.net/client/)
- Install OpenVPN Connect Application
-
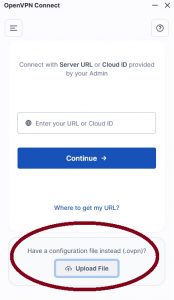
- Open OpenVPN Connect and import the center provided .ovpn profile.
-
 Click Connect. Enter your VPN username and password (if prompted).
- Click the ☰ (three horizontal lines) in the top-left corner to open Menu Tab.
- Click My Profiles.
- Select your VPN profile.
- Click the ✏️ Edit icon next to the profile.
- Enter your Credentials and Save.
-
-
- Open Google Play Store. And install OpenVPN Connect.
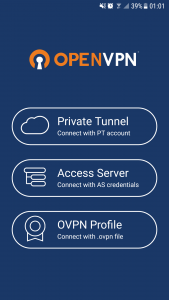
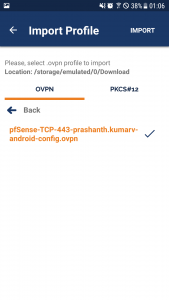
- Open the App and click on OVPN Profile.
-
- Browse to your VPN configuration file provided by your Admininstrator. And click Import
-
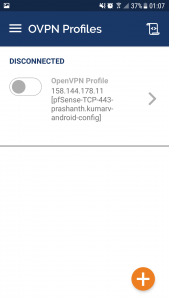
- Type your Username & Password of your VPN connection. And click Add.
- Now Swipe the button to Connect.
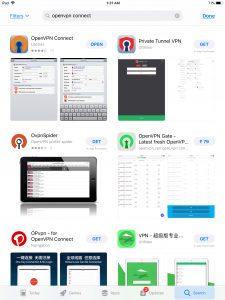
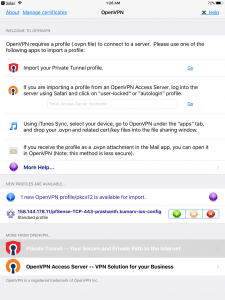
- Open App store and install OpenVPN Connect.
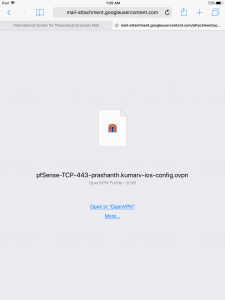
- Open your Mail and click on the VPN file provided by your Administrator. And click “Open in OpenVPN”
- Click on + to add the configuration.
- Enter your Username and Password for your VPN connection. Click on Connect.